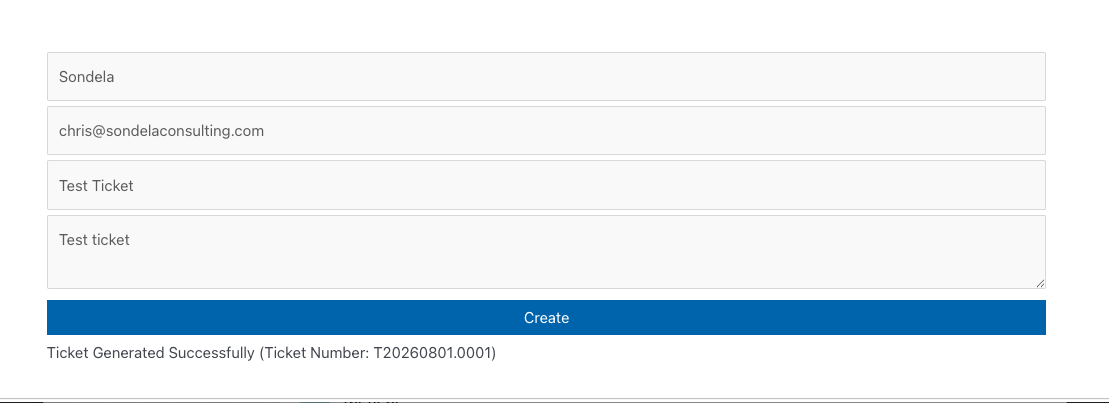
This tool allows you to have a simple create ticket page on wordpress using a short-code. Your customers can enter their email address, and its looked up against Autotask, if it exists it creates against that company, if not the assigned catchall will be assigned
Installation and usage
Autotask Ticket Update — Installation Guide
WordPress plugin that lets visitors look up an Autotask ticket and add a note to
it, and (optionally) raise a new ticket, straight from a page on your site.
Plugin folder:sondela-autotask-ticketing
Main file:autotask-ticket-update.php
Version: 0.3
API: Autotask REST API (atservicesrest/v1.0) via Guzzle — no SOAP
extension required
Licensing: none. This build has the licence-key system removed entirely,
so the plugin works as soon as it is activated and configured.
1. Requirements
Item
Requirement
WordPress
5.0 or newer
PHP
7.4 – 8.2 recommended (see note below)
PHP extensions
curl, json, openssl (all standard). SOAP is not needed.
Outbound network
The web server must be able to reach https://webservices.autotask.net and your Autotask zone host, e.g. https://webservices2.autotask.net, on port 443
Autotask
An API User (API-only) resource and an Integration Vendor tracking identifier
Theme
Must load jQuery and call wp_footer() — nearly every theme does
PHP 8.3 / 8.4 note: the bundled Guzzle (7.2) emits deprecation notices
on very new PHP. They are harmless and invisible on a normal production site
(WP_DEBUG_DISPLAY off), but they will fill your debug log if WP_DEBUG is
on. PHP 8.0–8.2 gives the cleanest run.
2. Create the Autotask API user
Do this first — you need three values before the plugin will do anything.
2.1 API user resource
Admin → Resources (Users) → New → New API User.
Fill in the usual resource fields (first name, last name, email).
Set to , or a custom API security
level. It needs, at minimum, the ability to:
read Contacts (used to match the submitter's email to a company)
Under Credentials, click Generate Key and Generate Secret.
Key → the plugin's API Username (looks like an email address)
Secret → the plugin's API Password
Under API Tracking Identifier, select Integration Vendor and choose
the vendor you set up in 2.1.
Save. Copy the secret now — Autotask will not show it again.
You should now have:
API Username : xxxxxxxxxxxxxx@YOURTENANT.COM
API Password : <the generated secret>
Tracking ID  : <integration vendor tracking identifier>
The plugin discovers your Autotask zone automatically from the API username
(it calls zoneInformation first), so there is no region/URL to configure.
3. Install the plugin
Option A — upload the zip (normal route)
WordPress admin → Plugins → Add New → Upload Plugin.
Choose sondela-autotask-ticketing-0.3.zip and click Install Now.
Click Activate.
If you are replacing an older copy, deactivate and delete the old plugin first —
WordPress will refuse to install over an existing folder of the same name.
Deleting the plugin does not delete your saved API settings.
Option B — copy the folder (SFTP / SSH)
Upload the sondela-autotask-ticketing folder to
wp-content/plugins/ so you end up with
wp-content/plugins/sondela-autotask-ticketing/autotask-ticket-update.php.
The vendor/ folder is bundled — you do not need to run composer install
on the server.
4. Configure it
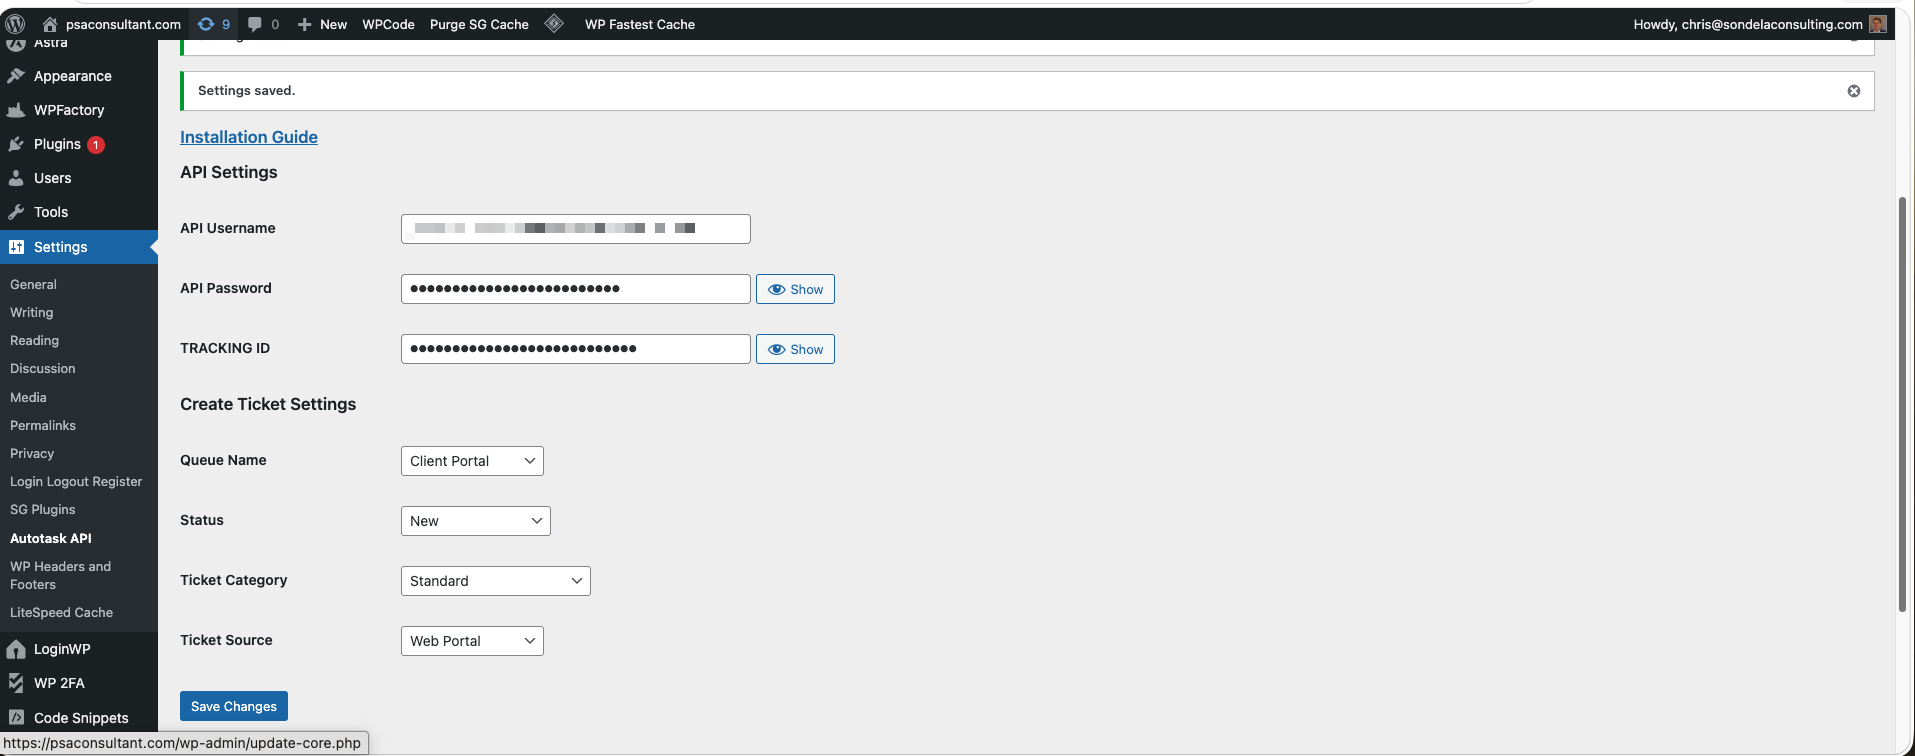
Go to Settings → Autotask API
(/wp-admin/options-general.php?page=autotask-api).
There is also a Settings link under the plugin on the Plugins screen.
Fill in:
API Username — the API user Key from step 2.2
API Password — the API user Secret
TRACKING ID — the Integration Vendor tracking identifier
Click Save Changes.
Reload the page. If the credentials work, a second section —
Create Ticket Settings — now appears with four dropdowns pulled live from
your Autotask instance:
Queue Name
Status
Ticket Category
Ticket Source
Pick the values you want new tickets created against and Save Changes
again.
These four settings are only used by the create ticket form. The ticket
lookup/note form works without them.
If the dropdowns do not appear, the message "Please Fill all the API
details correctly to show more settings!" is shown instead — see
Troubleshooting.
5. Put the forms on a page
Two shortcodes are available. Add either (or both) to any post, page or
shortcode-capable block/widget.
[atu_ticketsearch_form] — look up a ticket and add a note
**WARNING - This will return information of the ticket to any user if the ticket number is recognised. So you may want to use this one for internal use rather than putting it onto a public page. **
Renders a single search box. The visitor enters a ticket ID and gets back:
ticket title and description
ticket number
created / due / last activity dates
the existing ticket notes
a text box and Add note button that posts a new note back to Autotask
The new note is created as a publish = 1 (visible to the customer) note.
Important: the search box expects the Autotask ticket ID (the internal
numeric record ID), not the T2024xxxx.xxxx ticket number. If you want your
customers to use the ticket number instead, that needs a code change to query
by ticketNumber rather than fetch by ID.
[atu_ticketcreate_form] — raise a new ticket
Renders Company Name / Email Address / Subject / Description and a Create
button. On submit the plugin:
Looks up an Autotask Contact by the email address given.
If found, the ticket is created against that contact's company; if not, it is
created with companyID = 0, so make sure that resolves sensibly in your
instance (a ticket with no valid company will be rejected by Autotask).
Creates the ticket using the Queue / Status / Category / Source you chose in
step 4, with priority 1.
Returns the new ticket number to the visitor.
Example page
<h2>Check an existing ticket</h2>
[atu_ticketsearch_form]

<h2>Raise a new ticket</h2>
[atu_ticketcreate_form]
6. Before you put this on a public page — read this
Worth knowing: the Autotask API password and tracking ID are stored in
plain text in the wp_options table under autotask_api_option_name, which is
normal for WordPress but means a database dump exposes them. Use an API user
scoped to the minimum permissions listed in step 2.2.
7. Troubleshooting
The Queue / Status / Category / Source dropdowns never appear
The plugin only shows them once a live getFieldInfo('Tickets') call succeeds.
Check, in order:
Did you save and then reload? The fields are built during page load, so
the first render after saving still shows the old state.
Credentials. Re-copy the Key and Secret. The Secret cannot be viewed
again in Autotask — if in doubt, generate a new one.
Tracking ID. A missing or wrong tracking identifier fails the same way as
bad credentials.
You should get JSON containing a url for your zone. A timeout means the
host is firewalled off.
Security level. The API user needs read access to Tickets to enumerate
the picklists.
Checking the debug log
The plugin is fairly chatty in the PHP error log on admin page loads — it logs
lines prefixed [DEBUG], including whether the API connected and the full
ticket field metadata it discovered. To see it, in wp-config.php:
[DEBUG] ERROR: API_Connect: true      <- credentials worked
[DEBUG] ERROR: API_Connect: FALSE     <- fields blank, nothing was tried
[DEBUG] Exception: ...                <- the API call itself failed
Turn WP_DEBUG back off when you are done — this logging fires on every admin
page load and the field dump is large.
The form shows but nothing happens on submit
The theme must call wp_footer(); the JavaScript is injected there.
The theme must load jQuery.
Open the browser console and check the POST to /wp-admin/admin-ajax.php.
A 0 or -1 response body usually means a caching/security plugin is
intercepting admin-ajax.php.
Page caching (WP Rocket, Cloudflare, LiteSpeed) can serve a stale form —
exclude the page from cache.
"Failed to get ticket id"
The ID was not found, or the API user cannot see that ticket. Remember it wants
the internal ticket ID, not the T… ticket number.
Ticket creation returns an error
The most common cause is a required field enforced by your Autotask ticket
category (for example a mandatory issue/sub-issue type, or a company that does
not accept the chosen queue). The raw Autotask error is returned to the browser
and is also visible in the debug log.
8. Uninstalling
Deactivate and delete from Plugins. The plugin has no uninstall routine, so
these wp_options rows survive deletion and can be removed by hand if wanted:
autotask_api_option_name — all API credentials and ticket defaults
atu_license_key — leftover from the old licensed build, if present